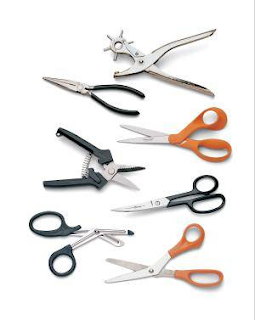
Material used:

Elastic Bandage
Cutter Blade
Heat Gun
Heat Pan
Heavy Duty Scissor
Instant Cooler
Stockinette
Thermoplastic
Valcro Set
Procedure:
- Prepare the patient
- Cover patient with sheet or gown to protect clothing
- Inspect skin for wounds and soft tissue injuries
- Clean, repair and dress wounds as usual prior to splint application
- Padding
- Apply stockinette to extremity to extend several cm beyond edges of plaster, so that it may be folded back over the edges of the splint after plaster is applied to create a smooth edge
- Roll on two to three layers of cast padding evenly and smoothly (but not too tight) over the area to be splinted.
- Extend the padding out beyond the planned area to be splinted so that it can be folded back with the stockinette over the edges of plaster to create smooth edges.
- Each turn of the webril/cast padding should overlap the previous by 25-50 % of its width.
- Place extra padding over bony prominences to decrease chance of creating pressure sores
- An alternative to circumferential stockinette and cast padding is to place 2-3 layers of padding directly over wet plaster, and then apply this webril-lined splint over the area to be immobilized and secure it with an elastic bandage
- Prepare the plaster splint material
- Ideal length and width of plaster depends on body part to be immobilized in the splint
- Estimate the length by laying the dry splint next to the area to be splinted
- Be generous in estimating length, the ends can always be trimmed or folded back
- Width should be slightly greater than the diameter of the limb to be immobilized
- Cut or tear the splint material to the desired length
- Choose thickness based on body part to be immobilized, patient body habitus, and desired strength of splint
i. Average of 8-12 layers
ii. Less layers (8-10) for upper extremities
iii. More layers (12-15) for lower extremities
iv. More layers may be needed for large patients
- Fill a bucket with cool water, deep enough to immerse the splint material into
i. Using cool water decreases the chances of thermal burns, but takes longer for the splint to dry
- Application of the splint
- Submerge the dry splint material in the bucket of water until bubbling stops
- Remove splint material and gently squeeze out the excess water until plaster is wet and sloppy
- Smooth out the splint to remove any wrinkles and laminate all layers
- Place the splint over the webril cast padding and smooth it onto the extremity
- An assistant (or a cooperative and willing patient) may be required to hold the splint in place while you adjust the splint
- Fold back the edges of the stockinette and cast padding over the ends of the splint
- Secure the splint with an elastic bandage
- Place the extremity in the desired position and mold the splint to the contour of the extremity using the palms of your hand. (Avoid using your fingers to mold in order to decrease indentations in the plaster which can lead to pressure sores)
- Hold the splint in the desired position until it hardens
- Check and finish the splint
- Check for vascular compromise
- Check for discomfort or pressure points
- Apply tape along the sides of the splint to prevent elastic bandages from rolling or slipping, (avoid circumferential tape to allow for swelling)
- Provide sling or crutches as needed


No comments:
Post a Comment